If you’re still running the factory 1.5 DIN in a 1999–2002 GMT800, this is one of the cleanest interior upgrades you can do. Brings the truck into the modern world — CarPlay, Bluetooth, nav, backup cam — without touching the rest of the dash layout.
Why It’s Not a Direct Swap
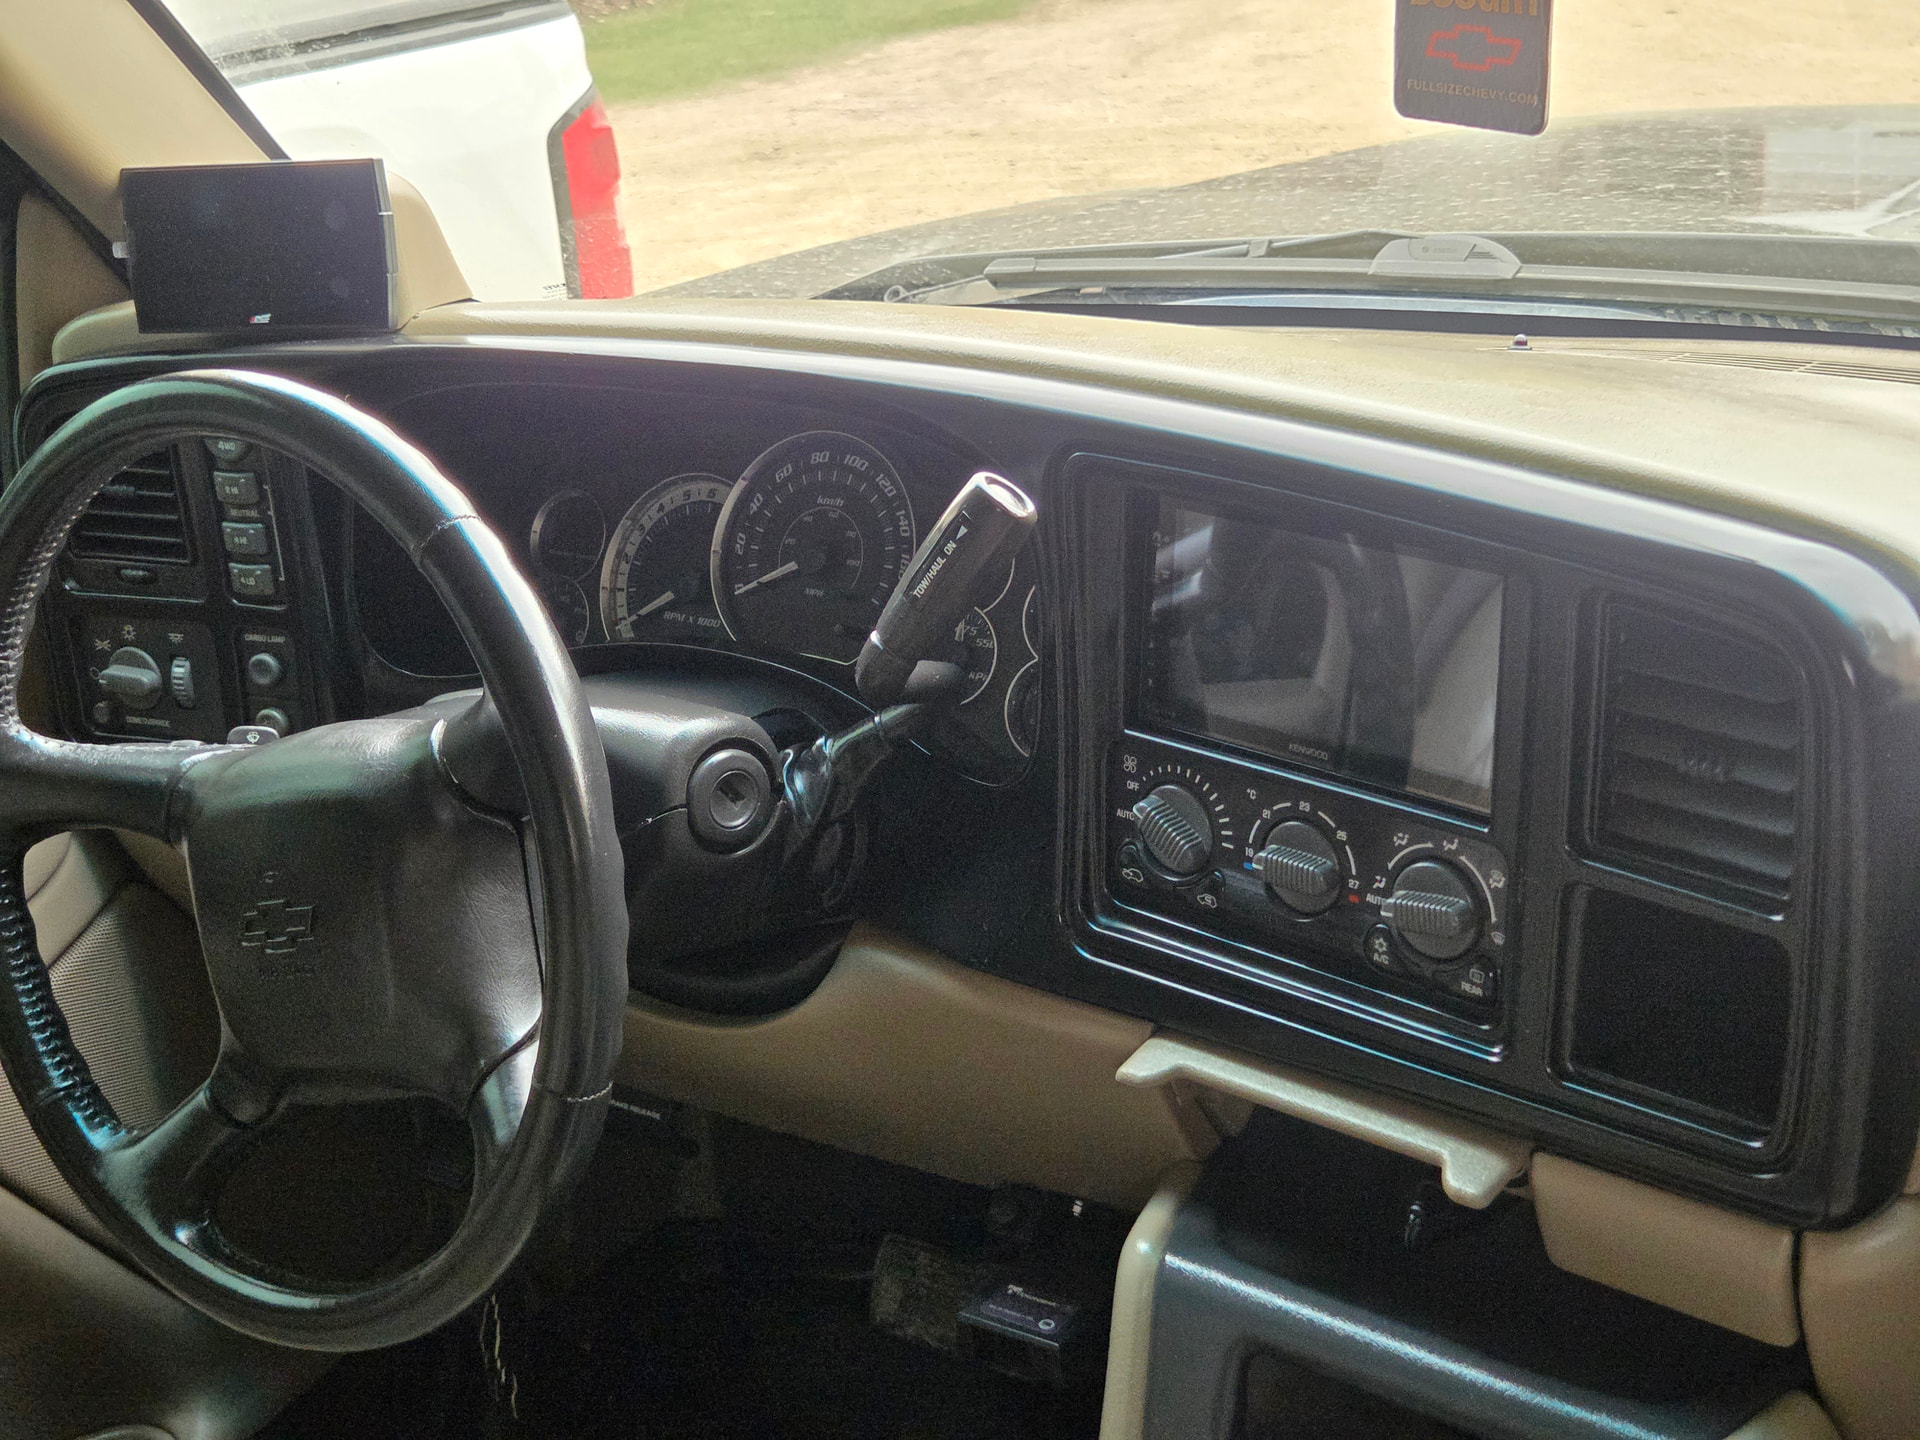
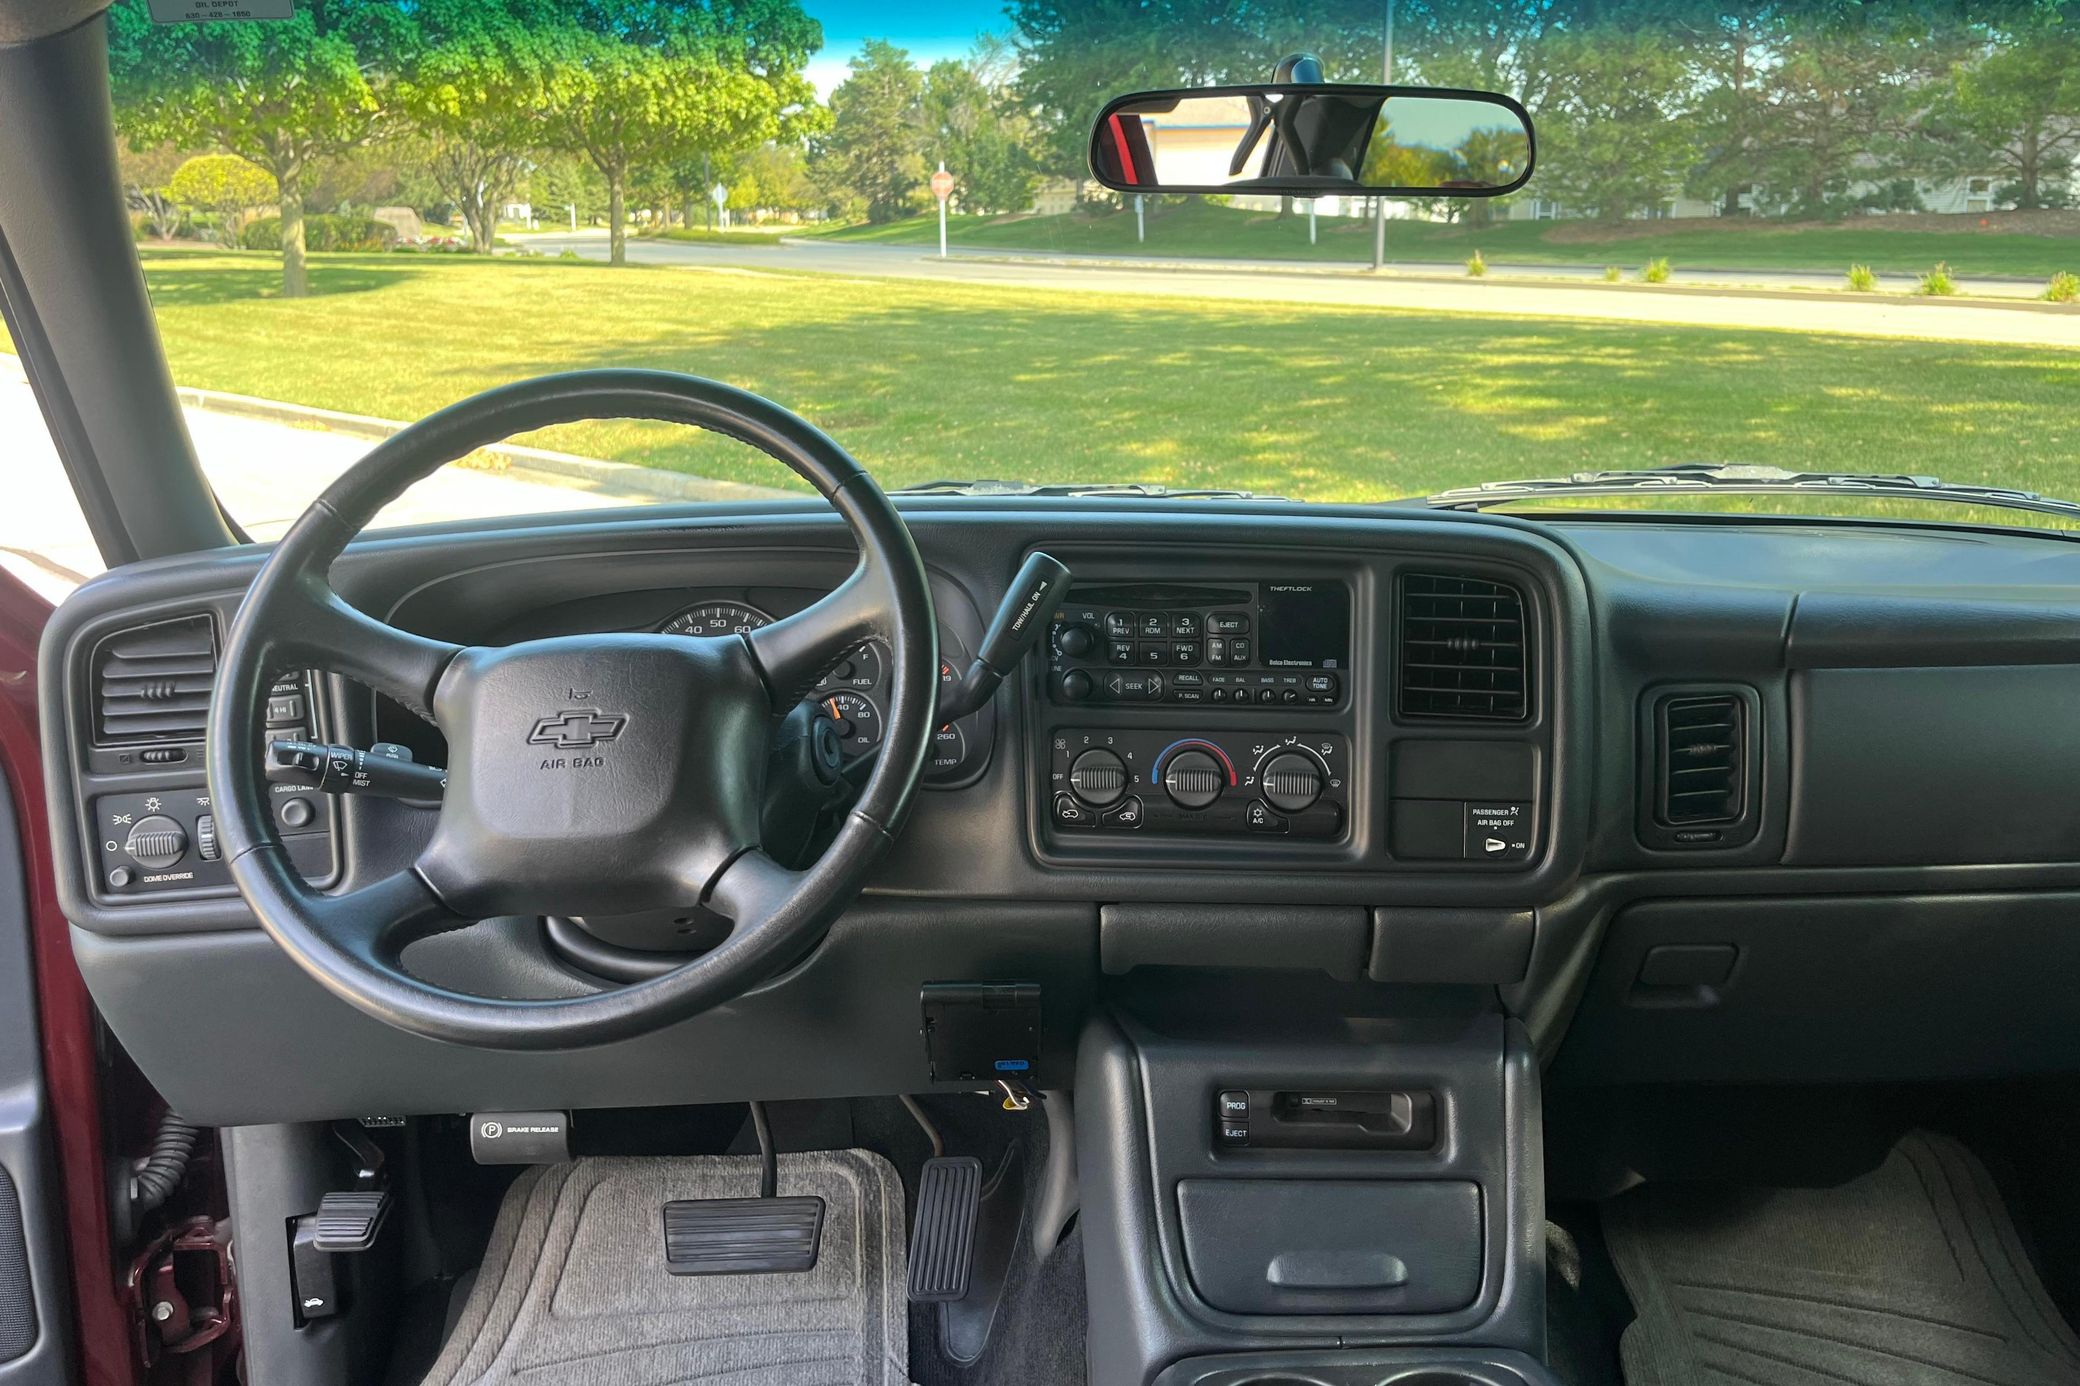
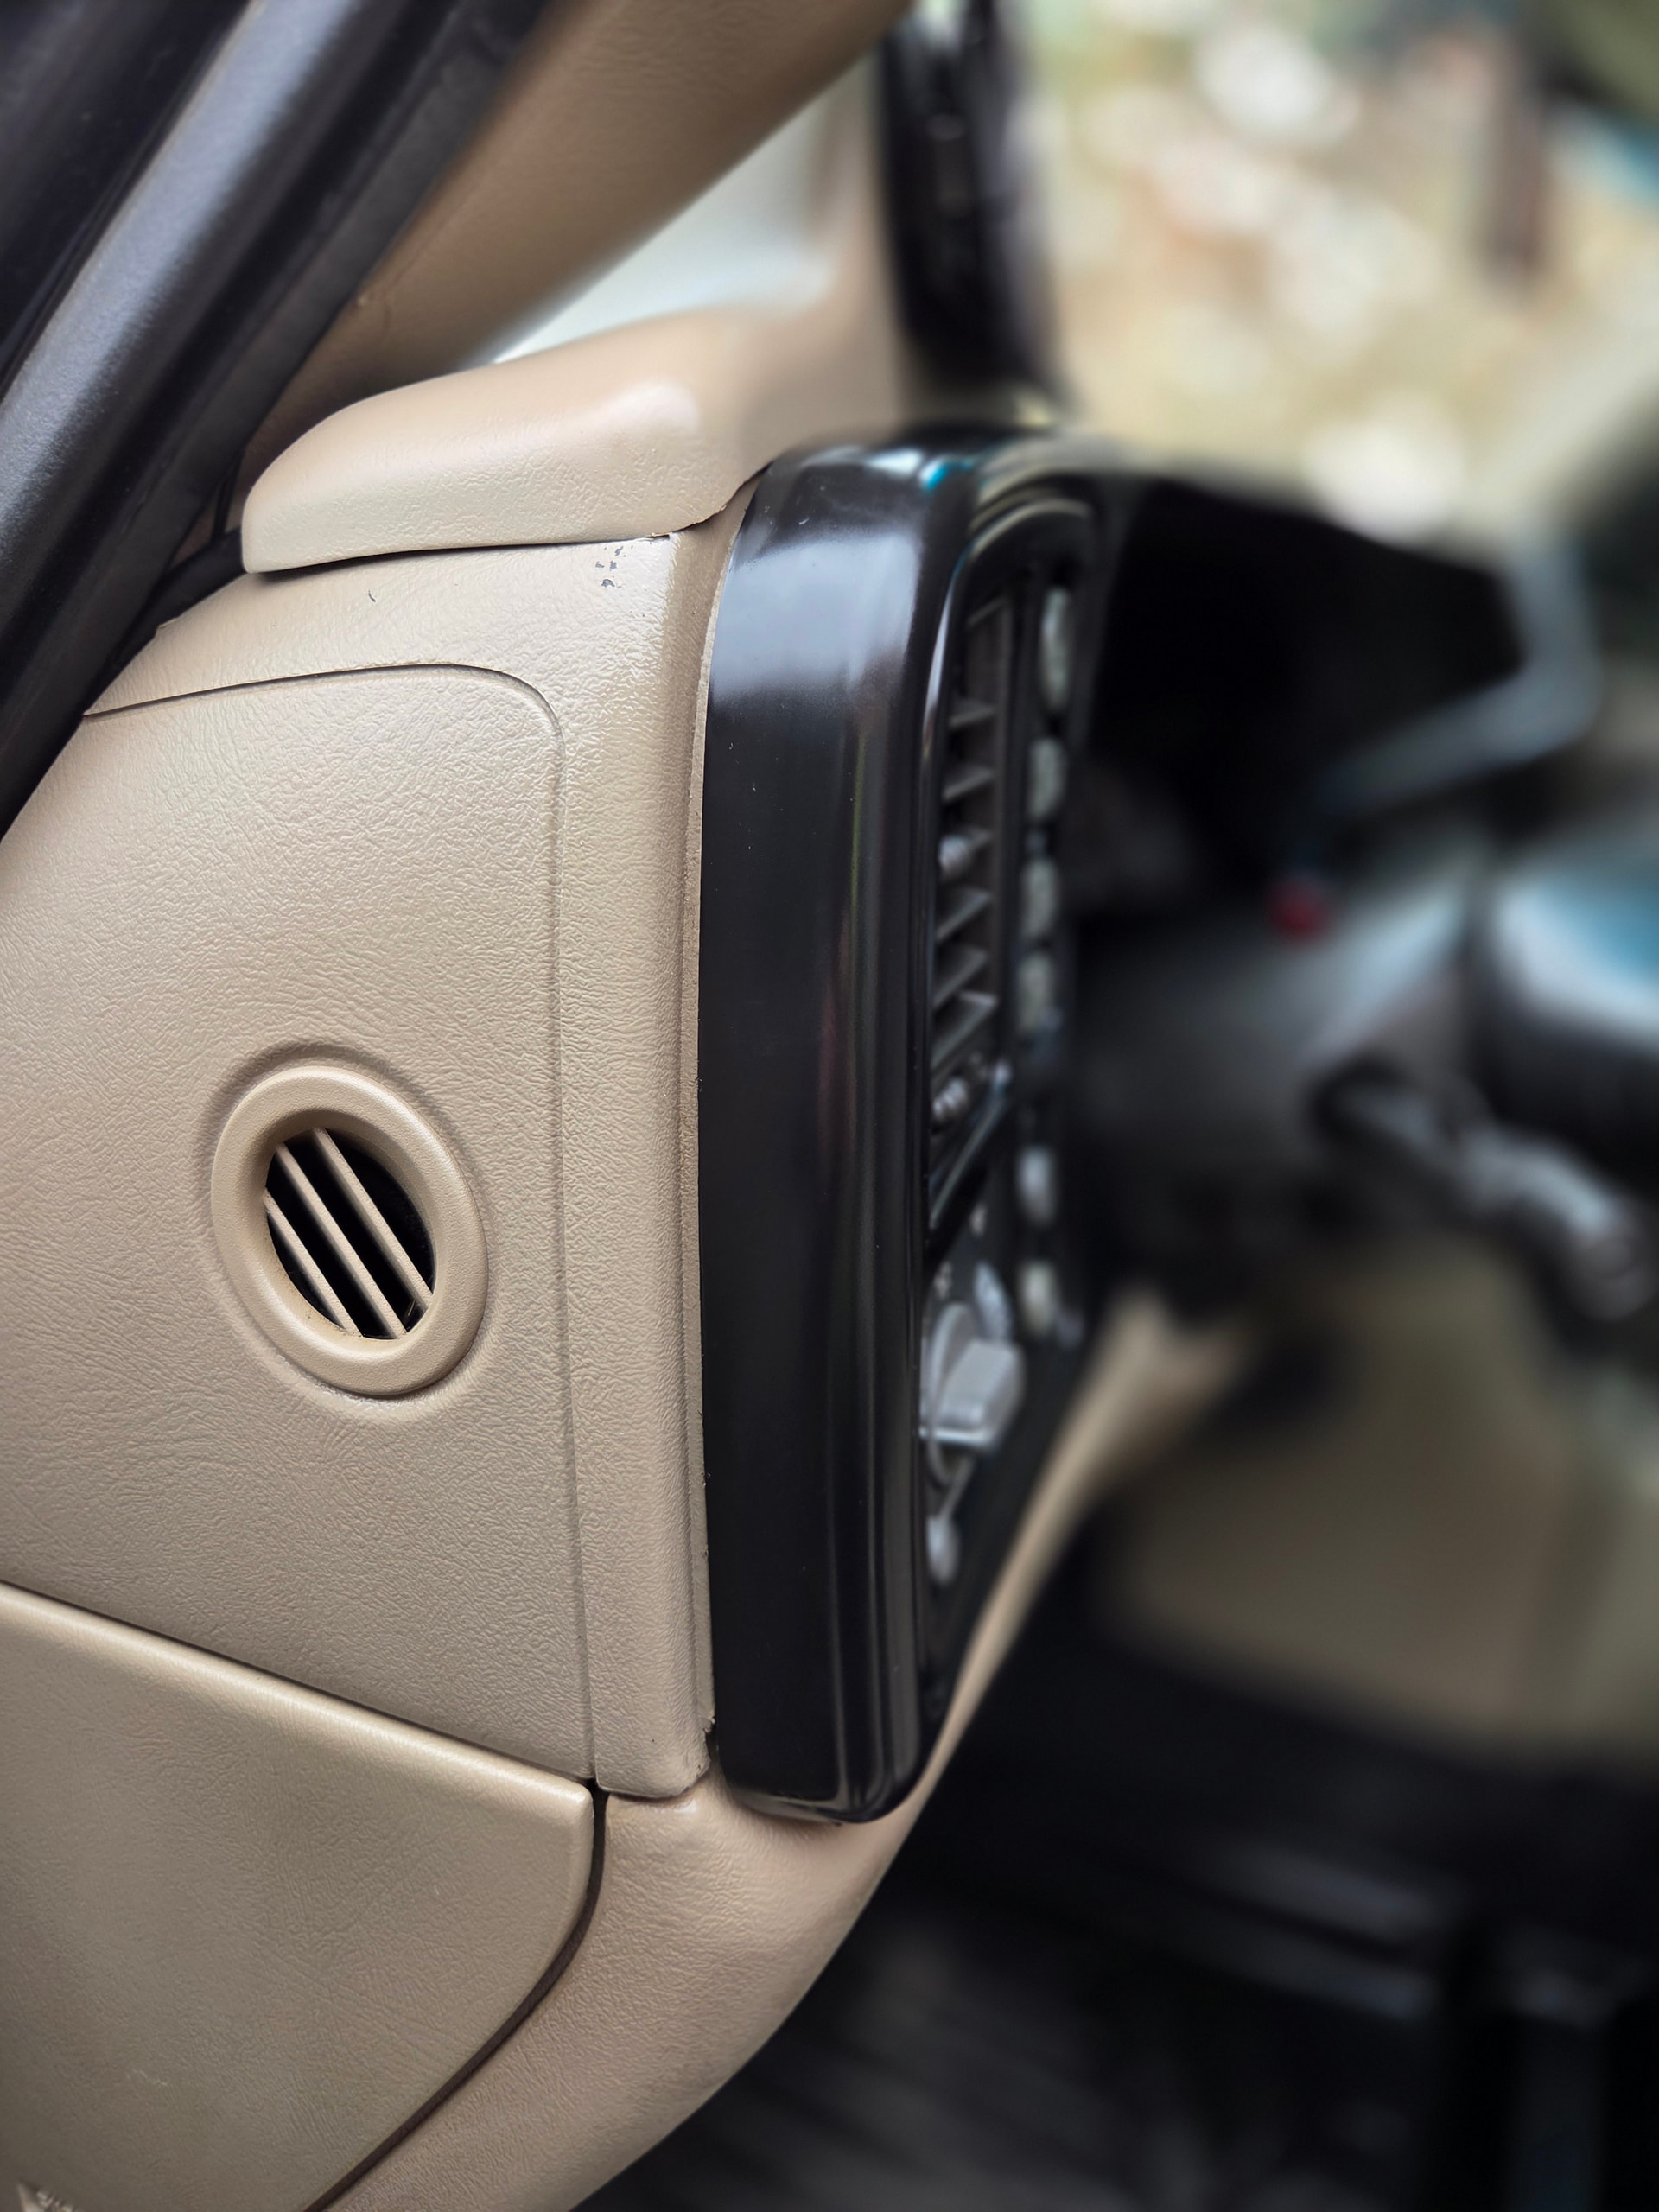
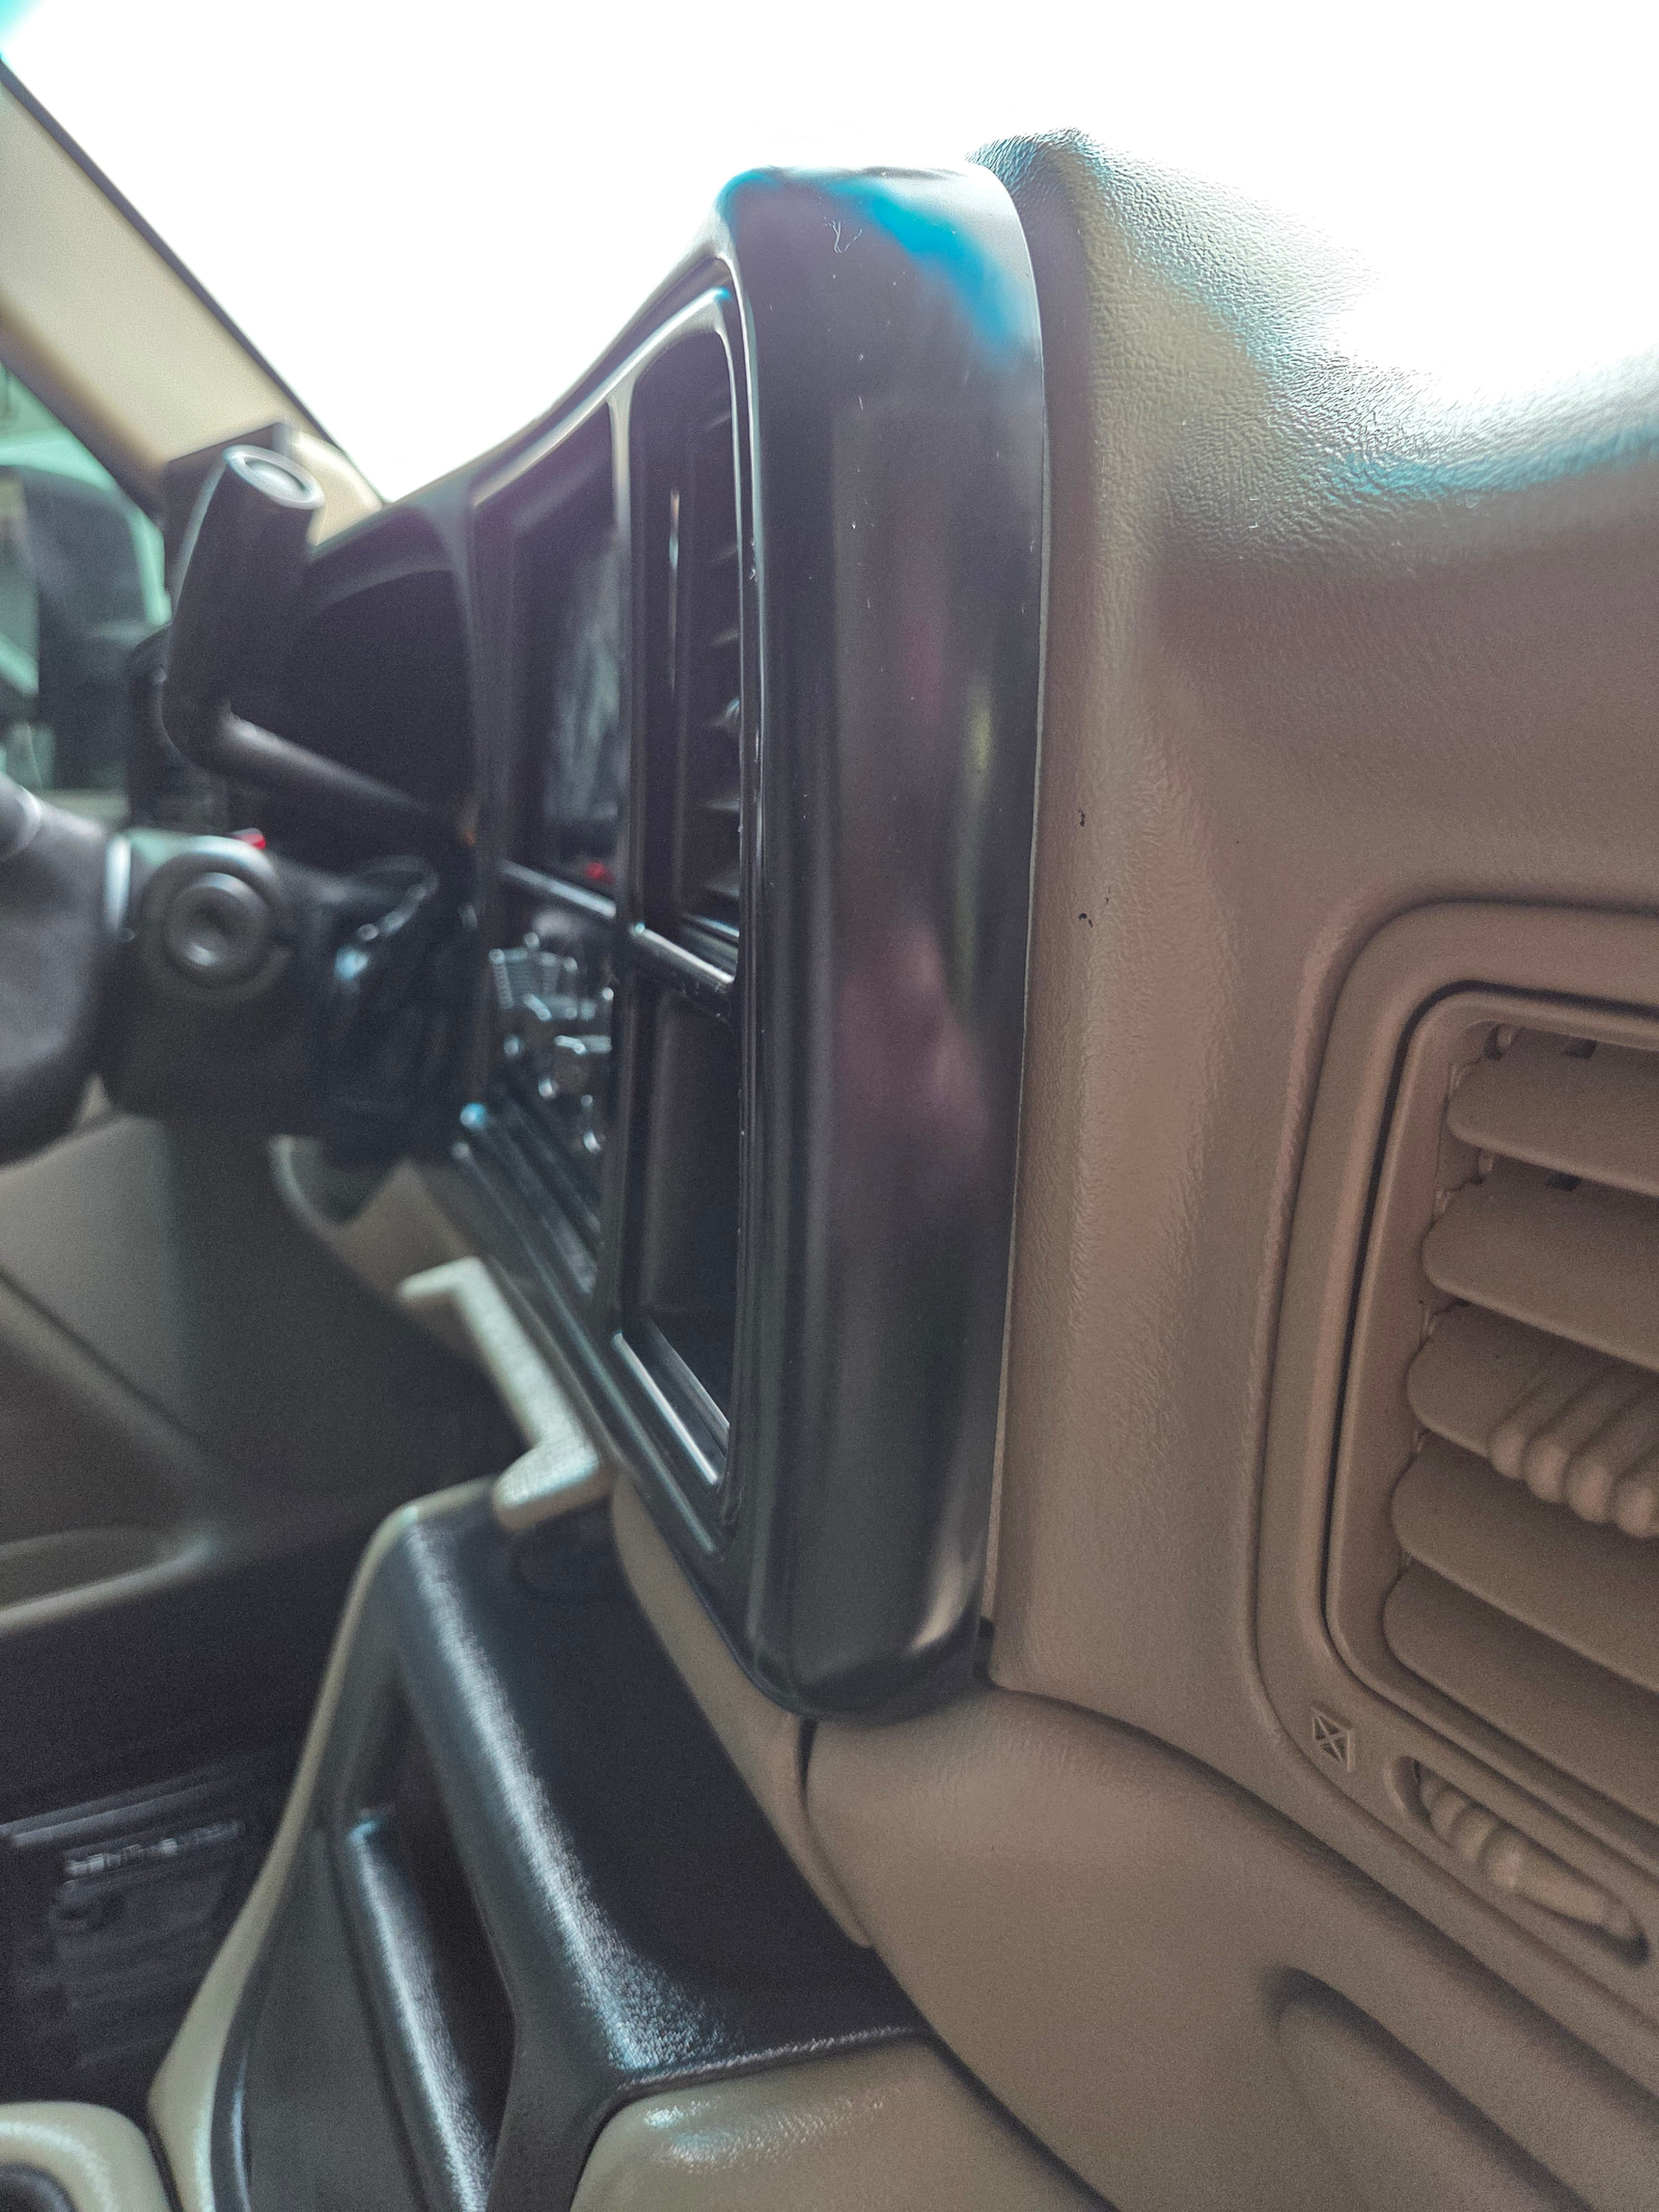
1999–2002 trucks came with a 1.5 DIN (DIN-and-a-half) setup. Better than the GMT400 single DIN, but still not a true double DIN. If you’re reading this, its likely your dash looks like below with the factory 1.5 radio.
2003–2006 GMT800 trucks did get a factory double DIN — but the dash layout changed.
Problem:
- HVAC controls sit lower on 99–02 trucks
- 03–06 bezel does not line up without moving the HVAC controls
- Not worth it for most builds → use a proper double DIN kit instead
The Right Way to Do It
Skip the retrofit of 03–06 parts.
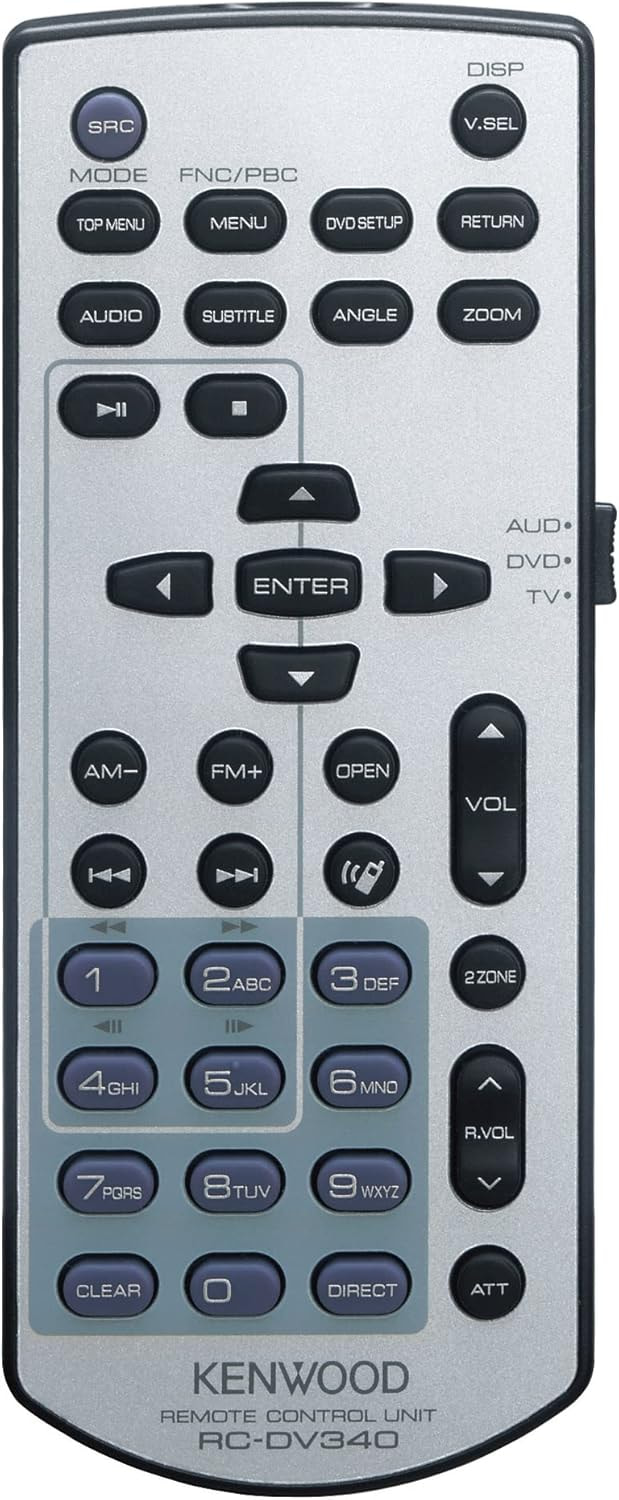
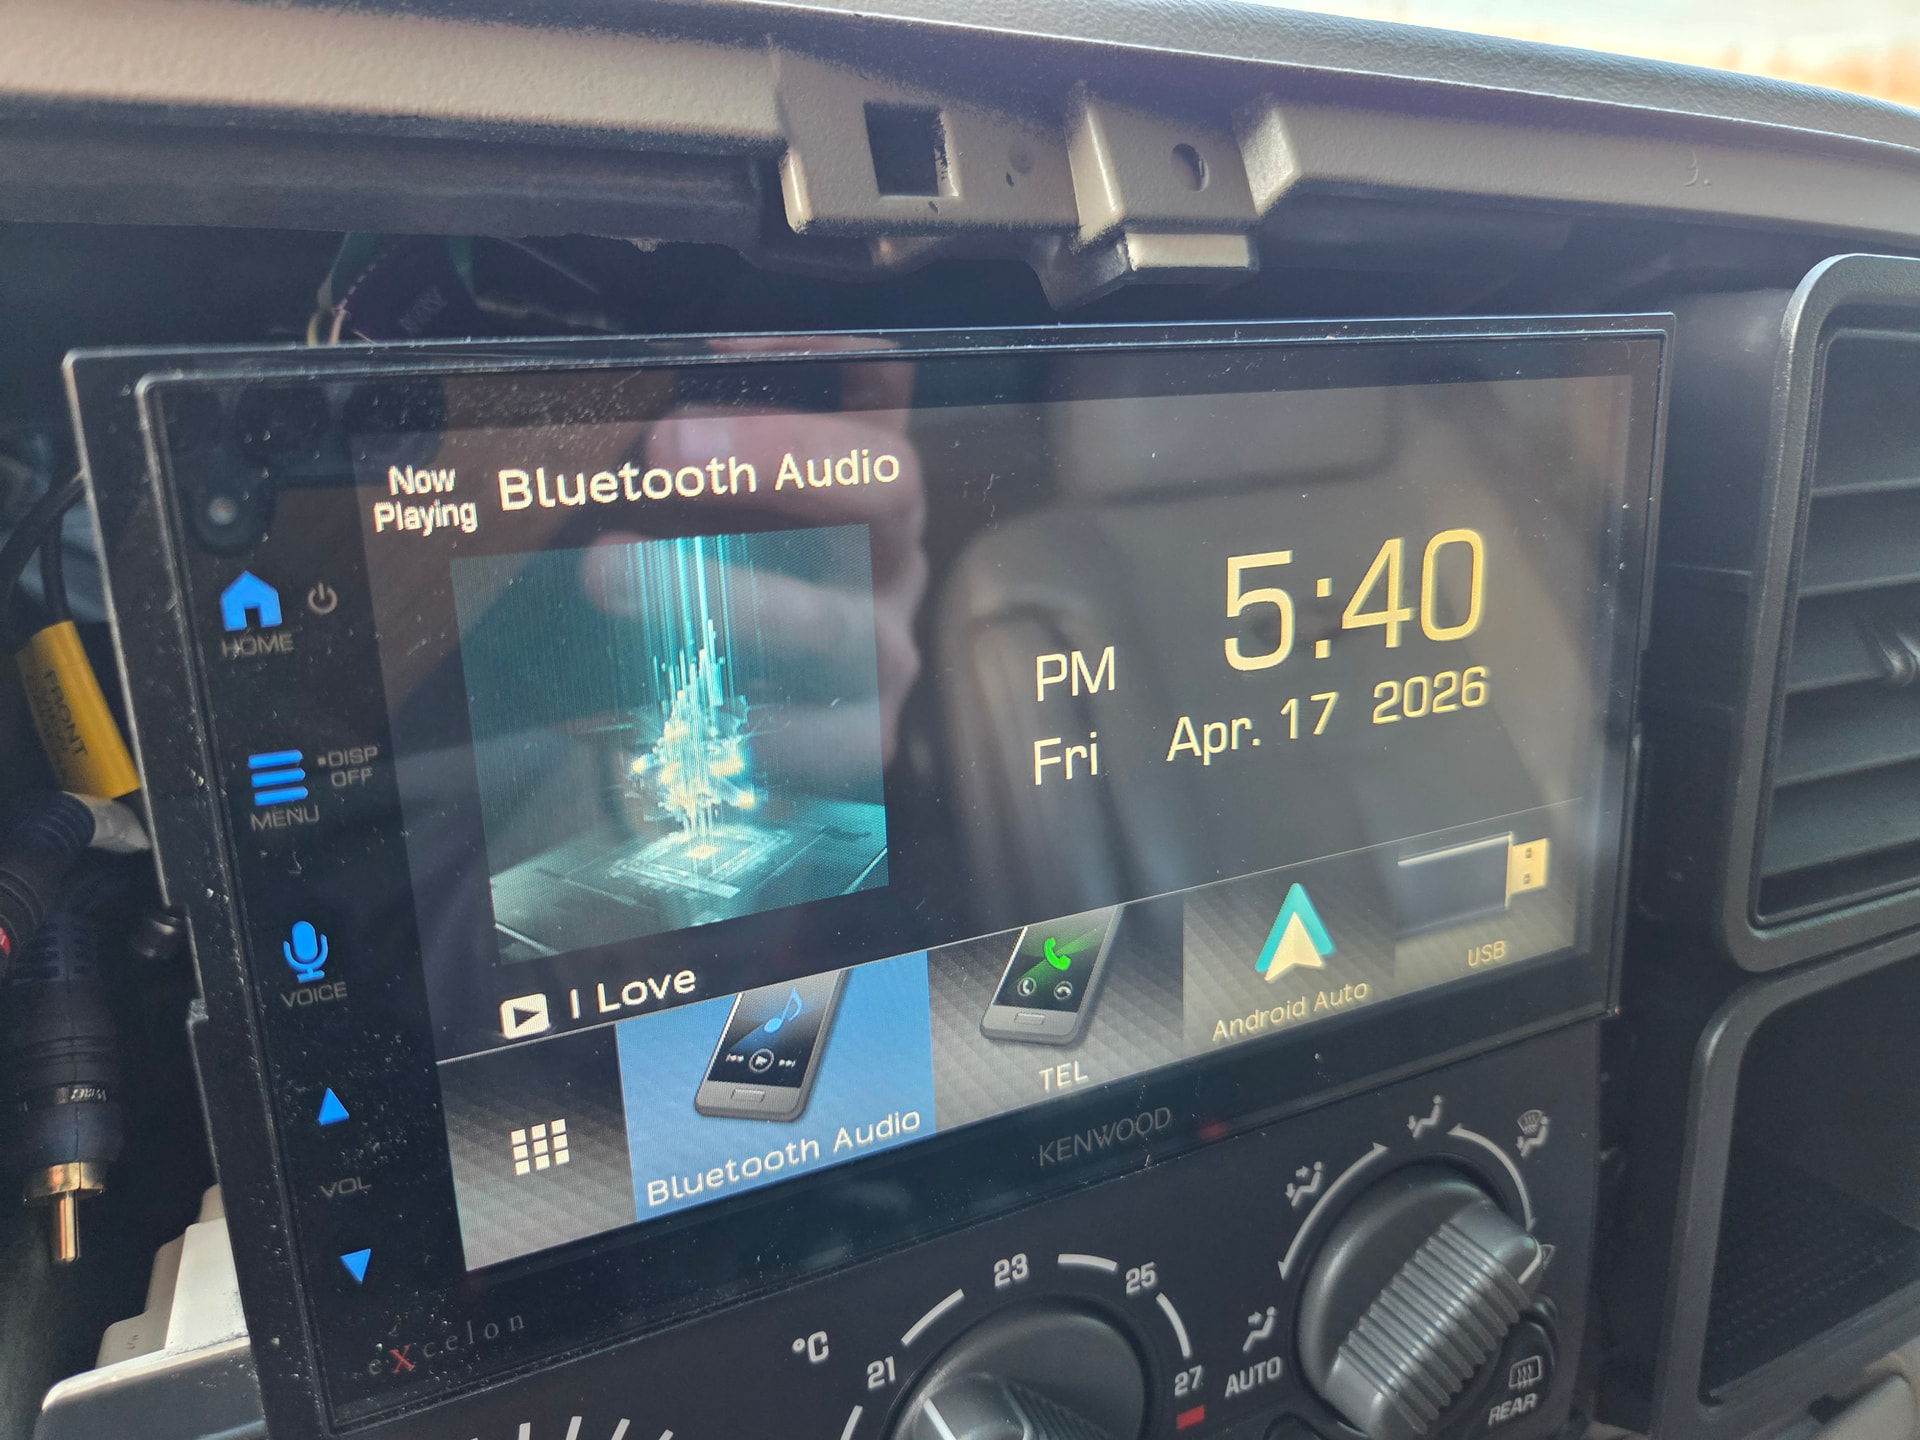
Use a double DIN conversion bezel made for 99–02 and add a quality head unit (think Kenwood, Alpine, Pioneer, etc). I’ve been happy with my Kenwood DMX709S — but can’t comment on its sound quality as I have all door speakers amped.
Common bezel options:
- Metra — clean fit, widely available
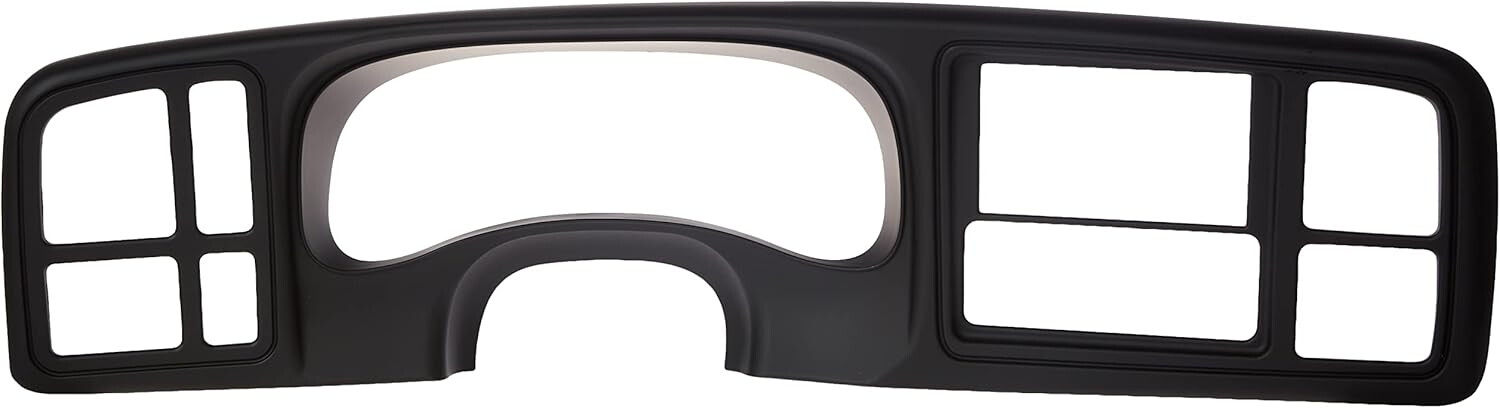
- DNA Motoring — budget option. Cheaper than the Metra kit. I went with this option in Black.
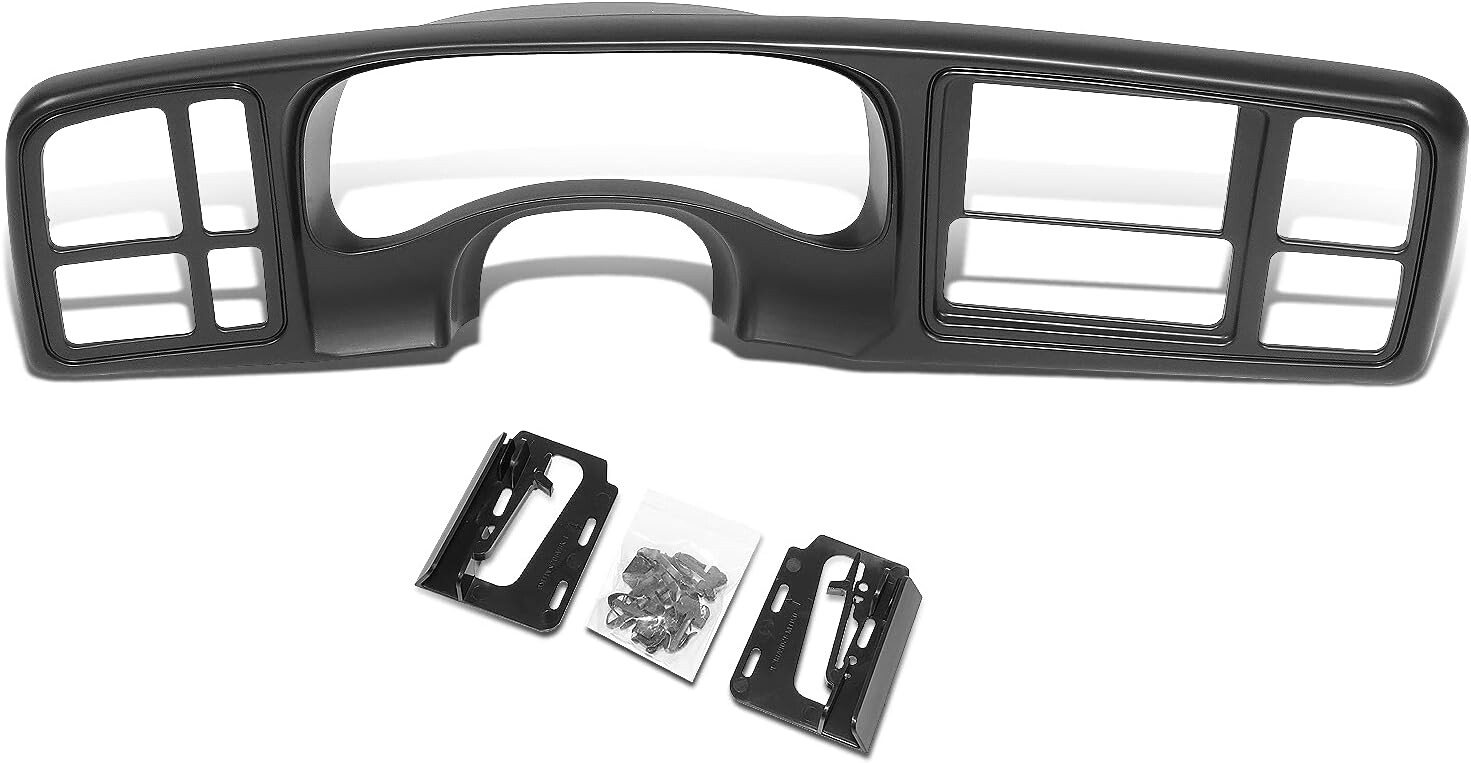
Bezel Fitment + Finish
- Don’t worry about color mismatch; paint it if needed using SEM Products. You can match your factory dash with SEM pretty good! Just make sure to prep the surfaces before hand.
- The best option is to buy a black textured bezel and keep it close to a factory look, as all your switches and HVAC are all black anyways.
- I went with the black DNA Motoring Bezel, and it seems to match and fit pretty good.
- I used 303 Protectant spray on it before install, which will hopefully keep the bezel finish from fading.
Important — Clips:
- Reuse your OEM clips
- You’ll need 2 picks to pry open and remove the OEM clips from your OEM bezel.
- Aftermarket clips are junk and don’t hold tight from past experiences
- You can physically see and feel a difference in the OEM clips to the aftermarket ones. Aftermarket will likely be shiny and very flimsy to the touch.

Dash Modification (Required)
You will need to trim the upper dash.
Behind the radio opening there’s a plastic tab that interferes with the double DIN height. Without the tab trimmed, your new Double DIN will likely not fit in the dash.
Fix: Cut the tab flush, with the dash.
Tools that work:
- Dremel
- Oscillating tool
- Rotary tool
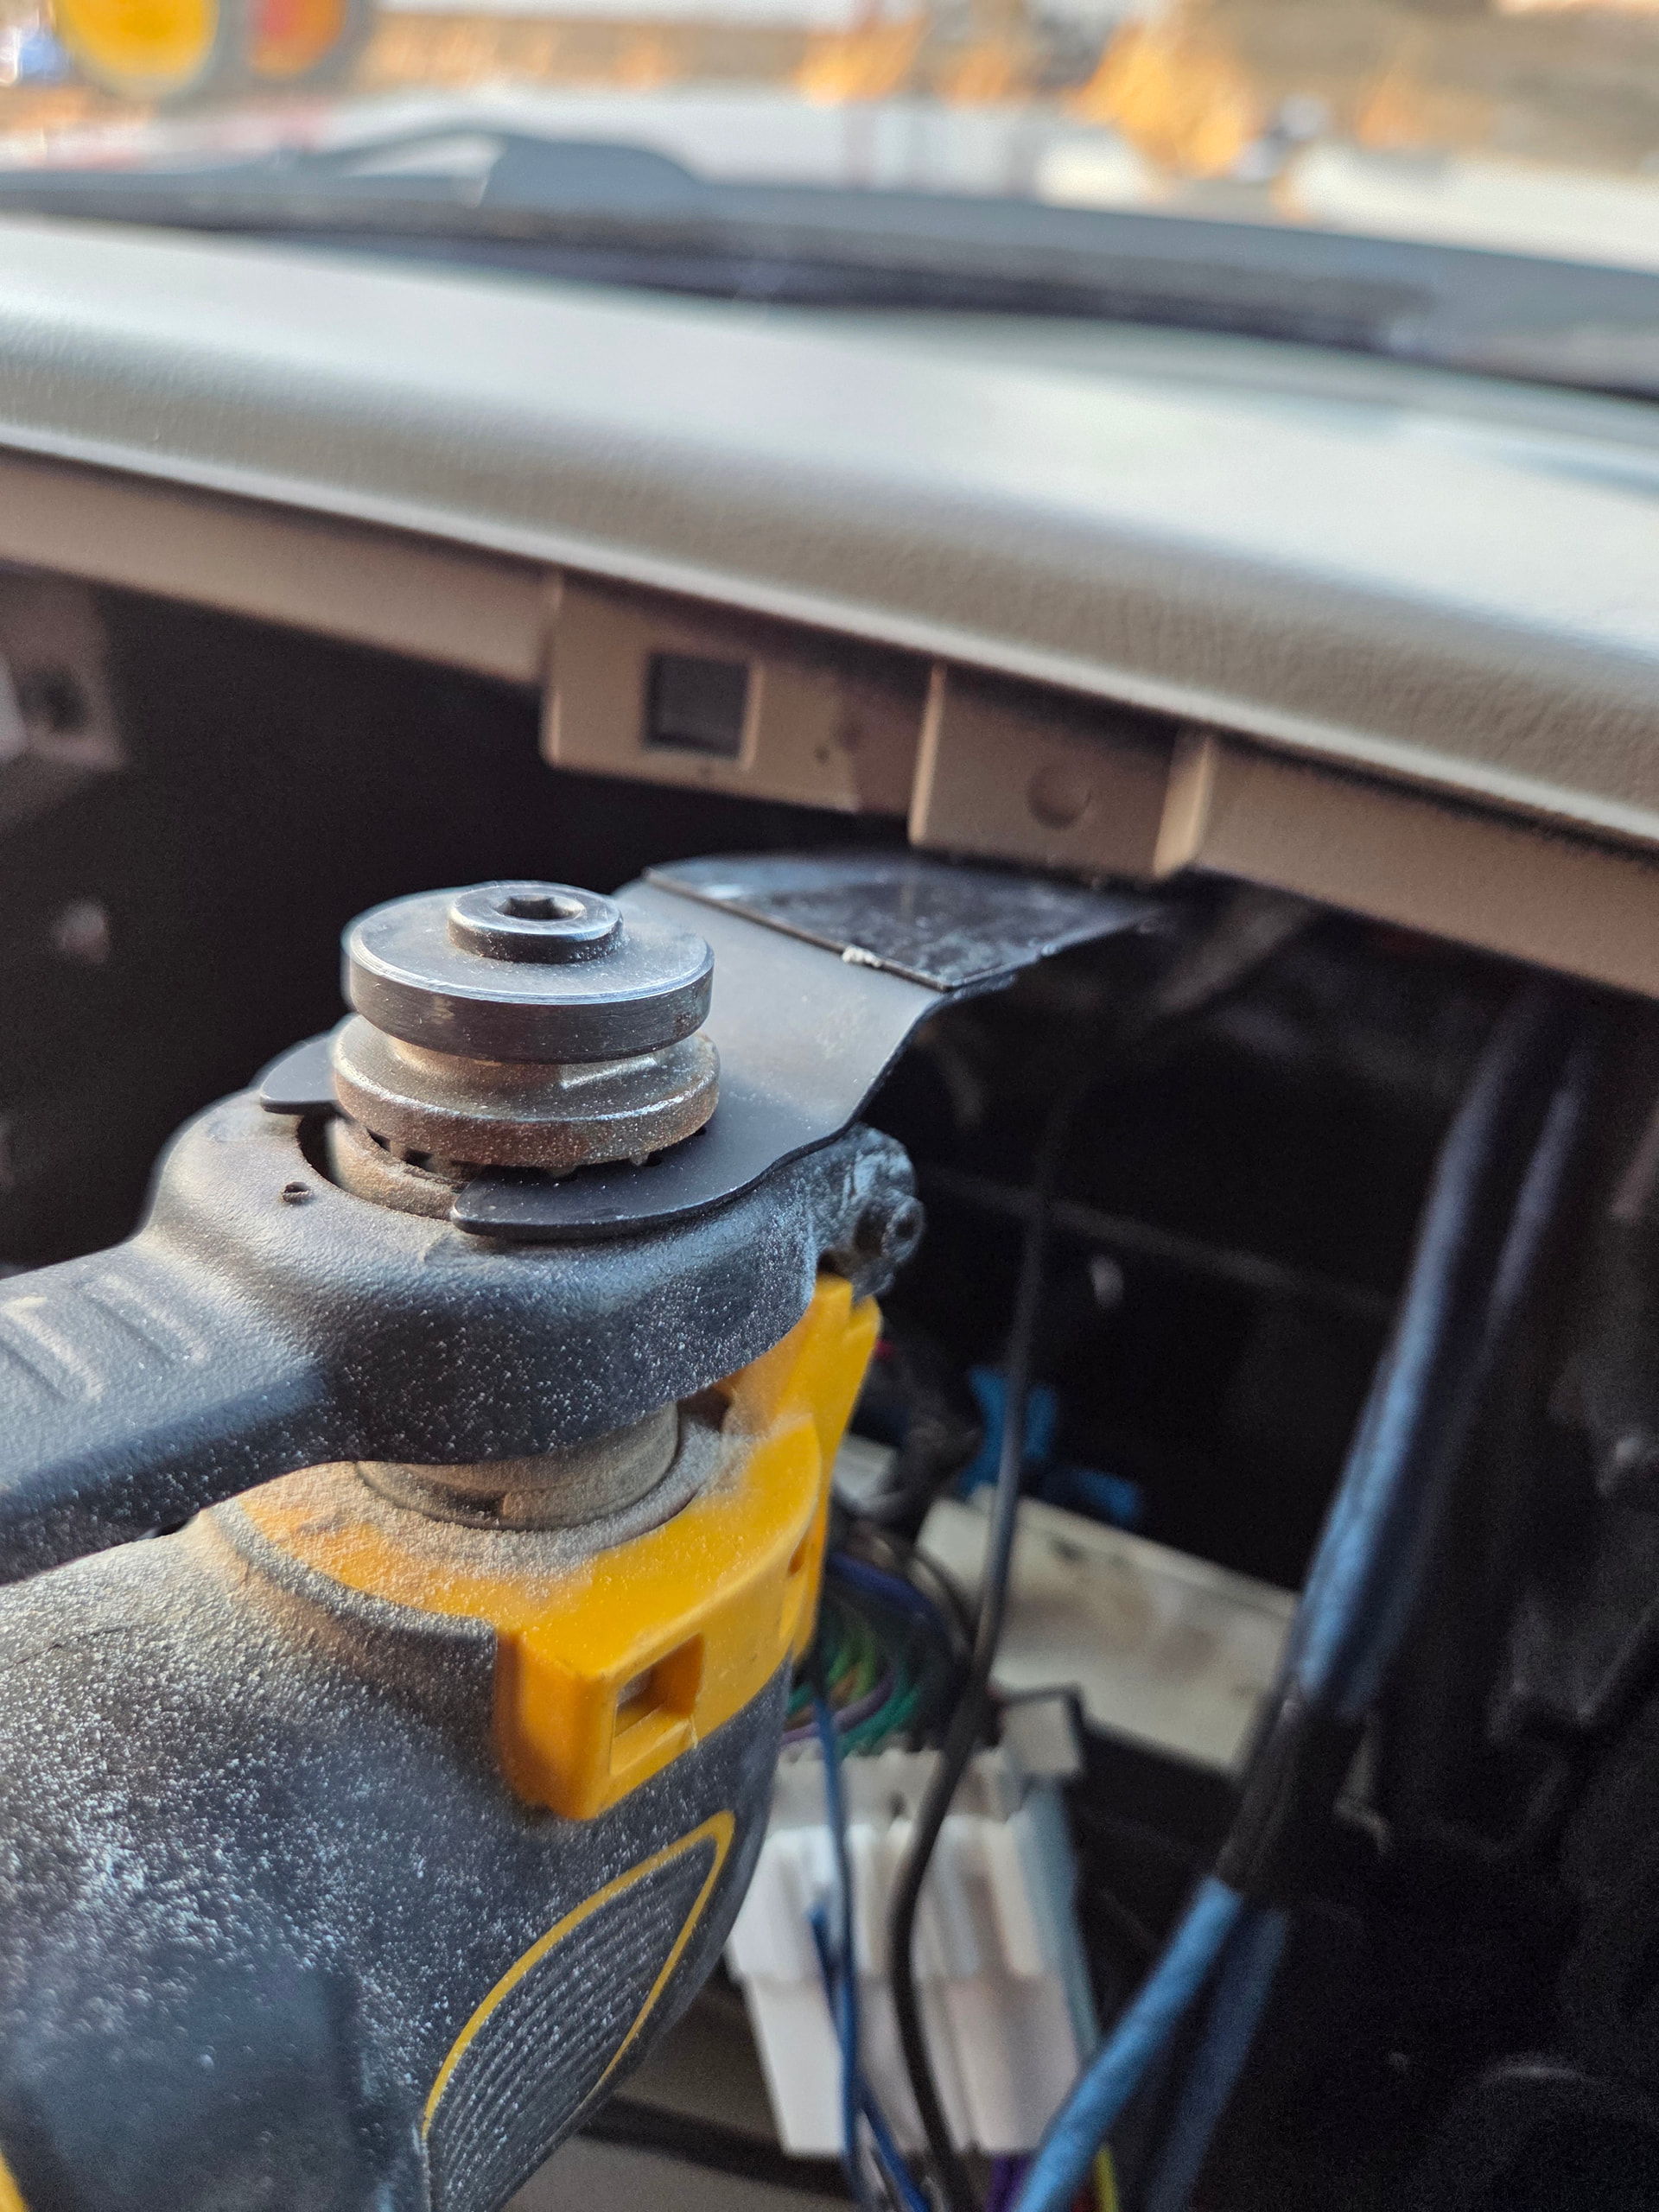
Take your time, make sure to do a clean cut. Make sure you move any wiring away to avoid hitting any stereo wires. If concerned about dust, use a vacuum to provide some suction underneath the tab as you cut. I chose to use my oscillating tool and a metal blade.
Wiring + Install
You won’t be able to plug in your double din directly. Once the factory stereo is removed you will be left with the harness, and any additional stereo wiring (RCA’s, etc).
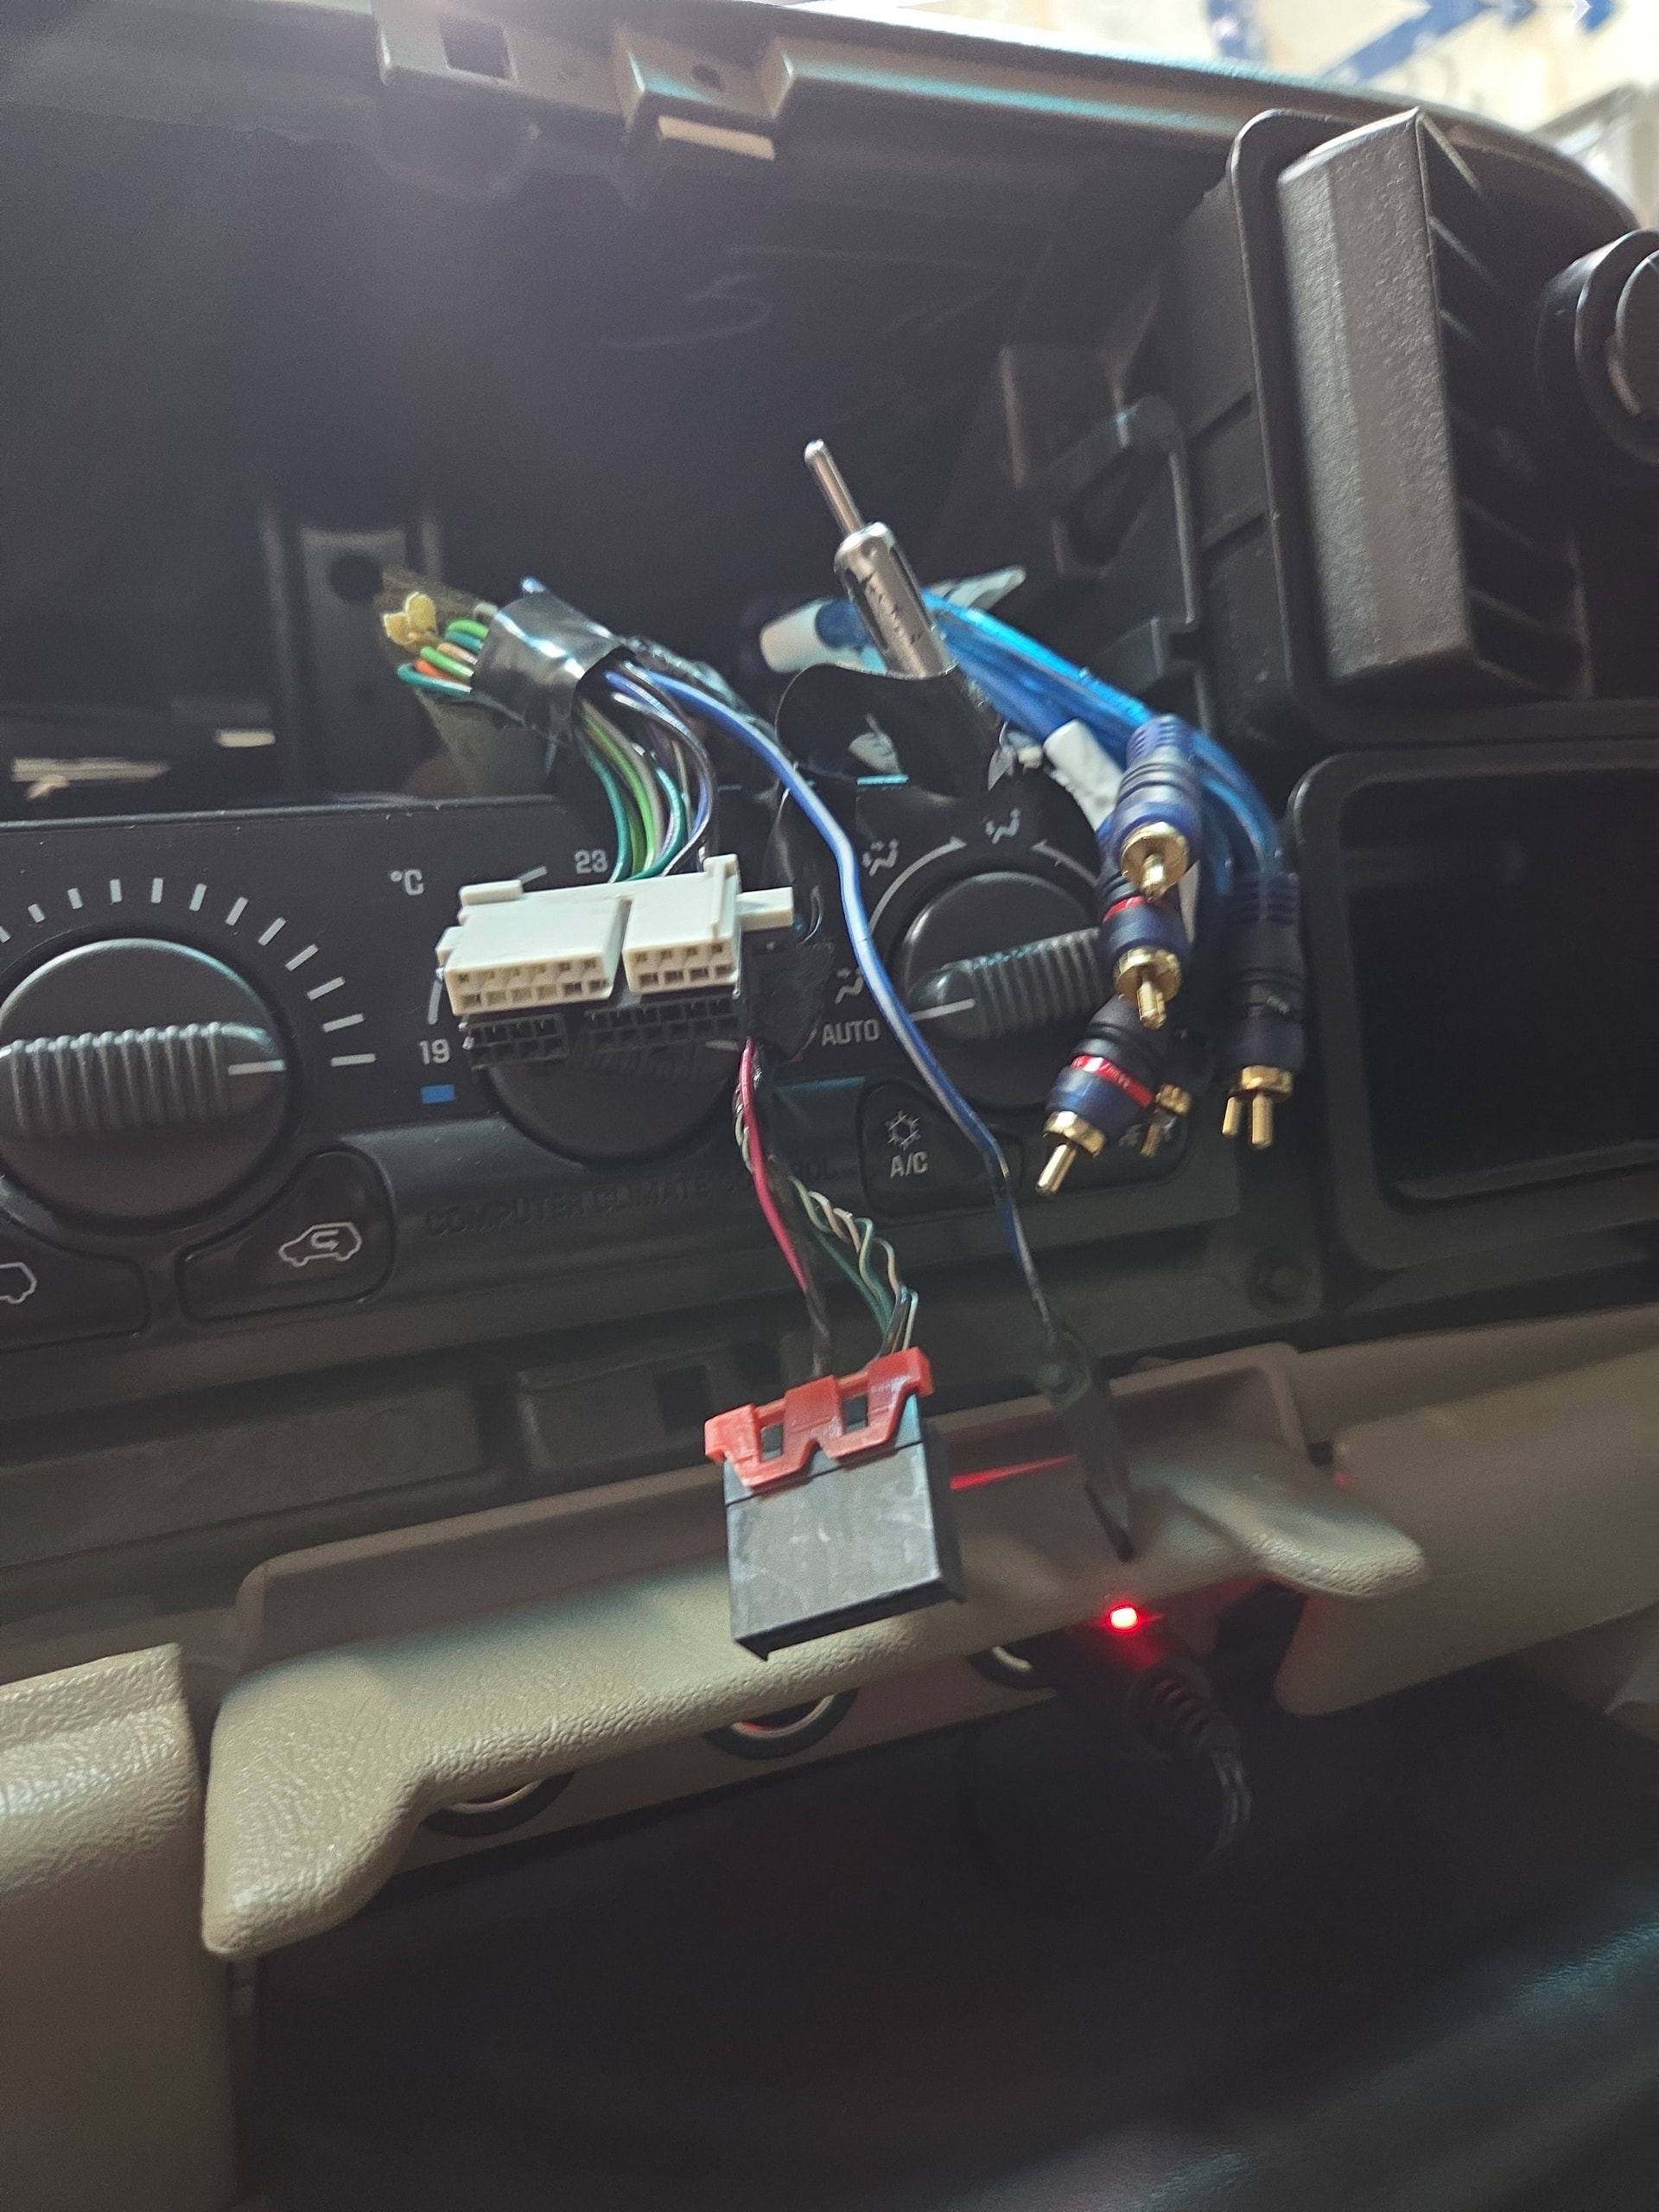
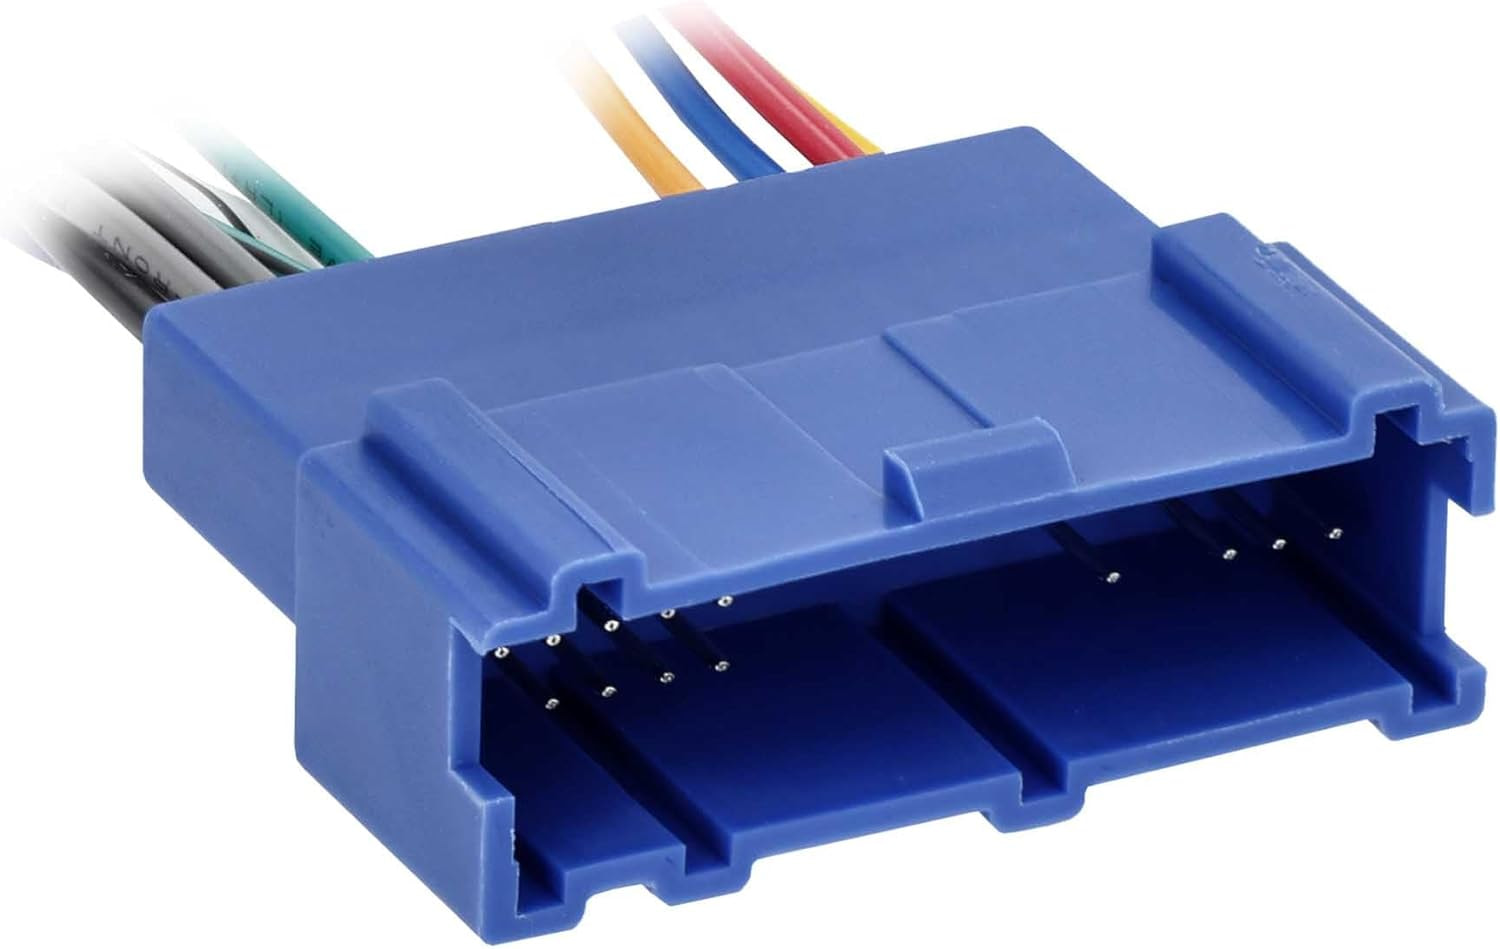
You will need a radio harness adapter, which connects the aftermarket head unit directly into the factory wiring.
- Crimp connections to the adapter using proper connectors. Butt connectors work; solder and heat shrink is stronger.
- No cutting the factory harness. It’s best to retain factory wiring integrity and use the adapter.
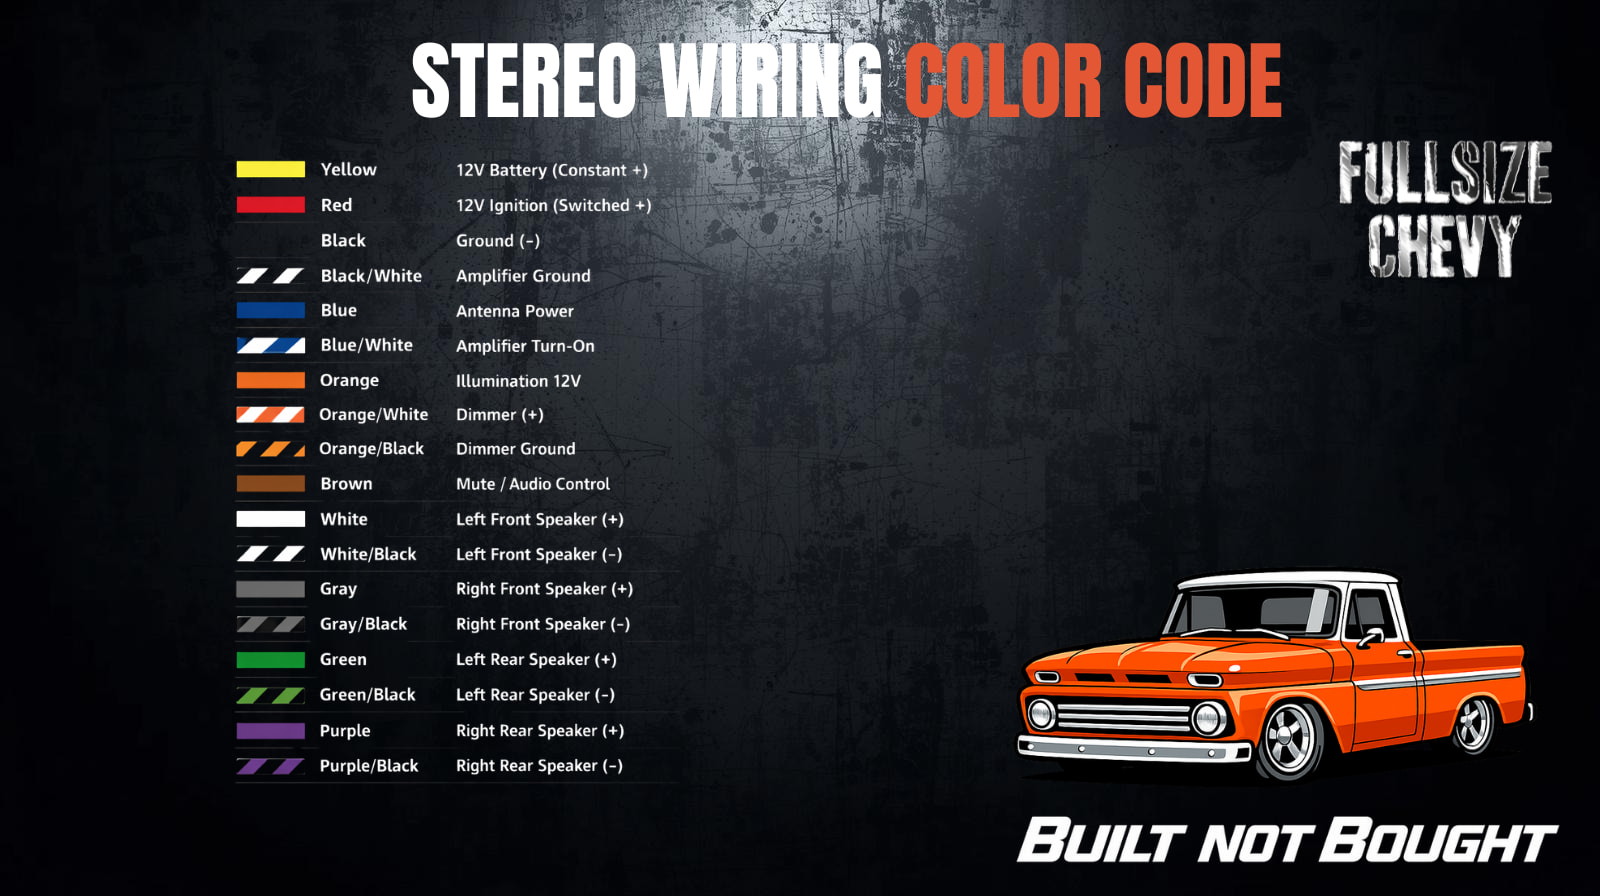
- Follow the stereo wiring color code below.
If you are wanting to retain AM/FM; you may need an antenna adapter as well.
Once wired:
- Slide the unit in, being careful to guide any wires behind the deck
- Bolt your factory deck slide-in brackets to the new deck once the height is confirmed.
- Don’t worry if you don’t have the factory brackets, Metra still makes them.
- The new bezel can then get installed!
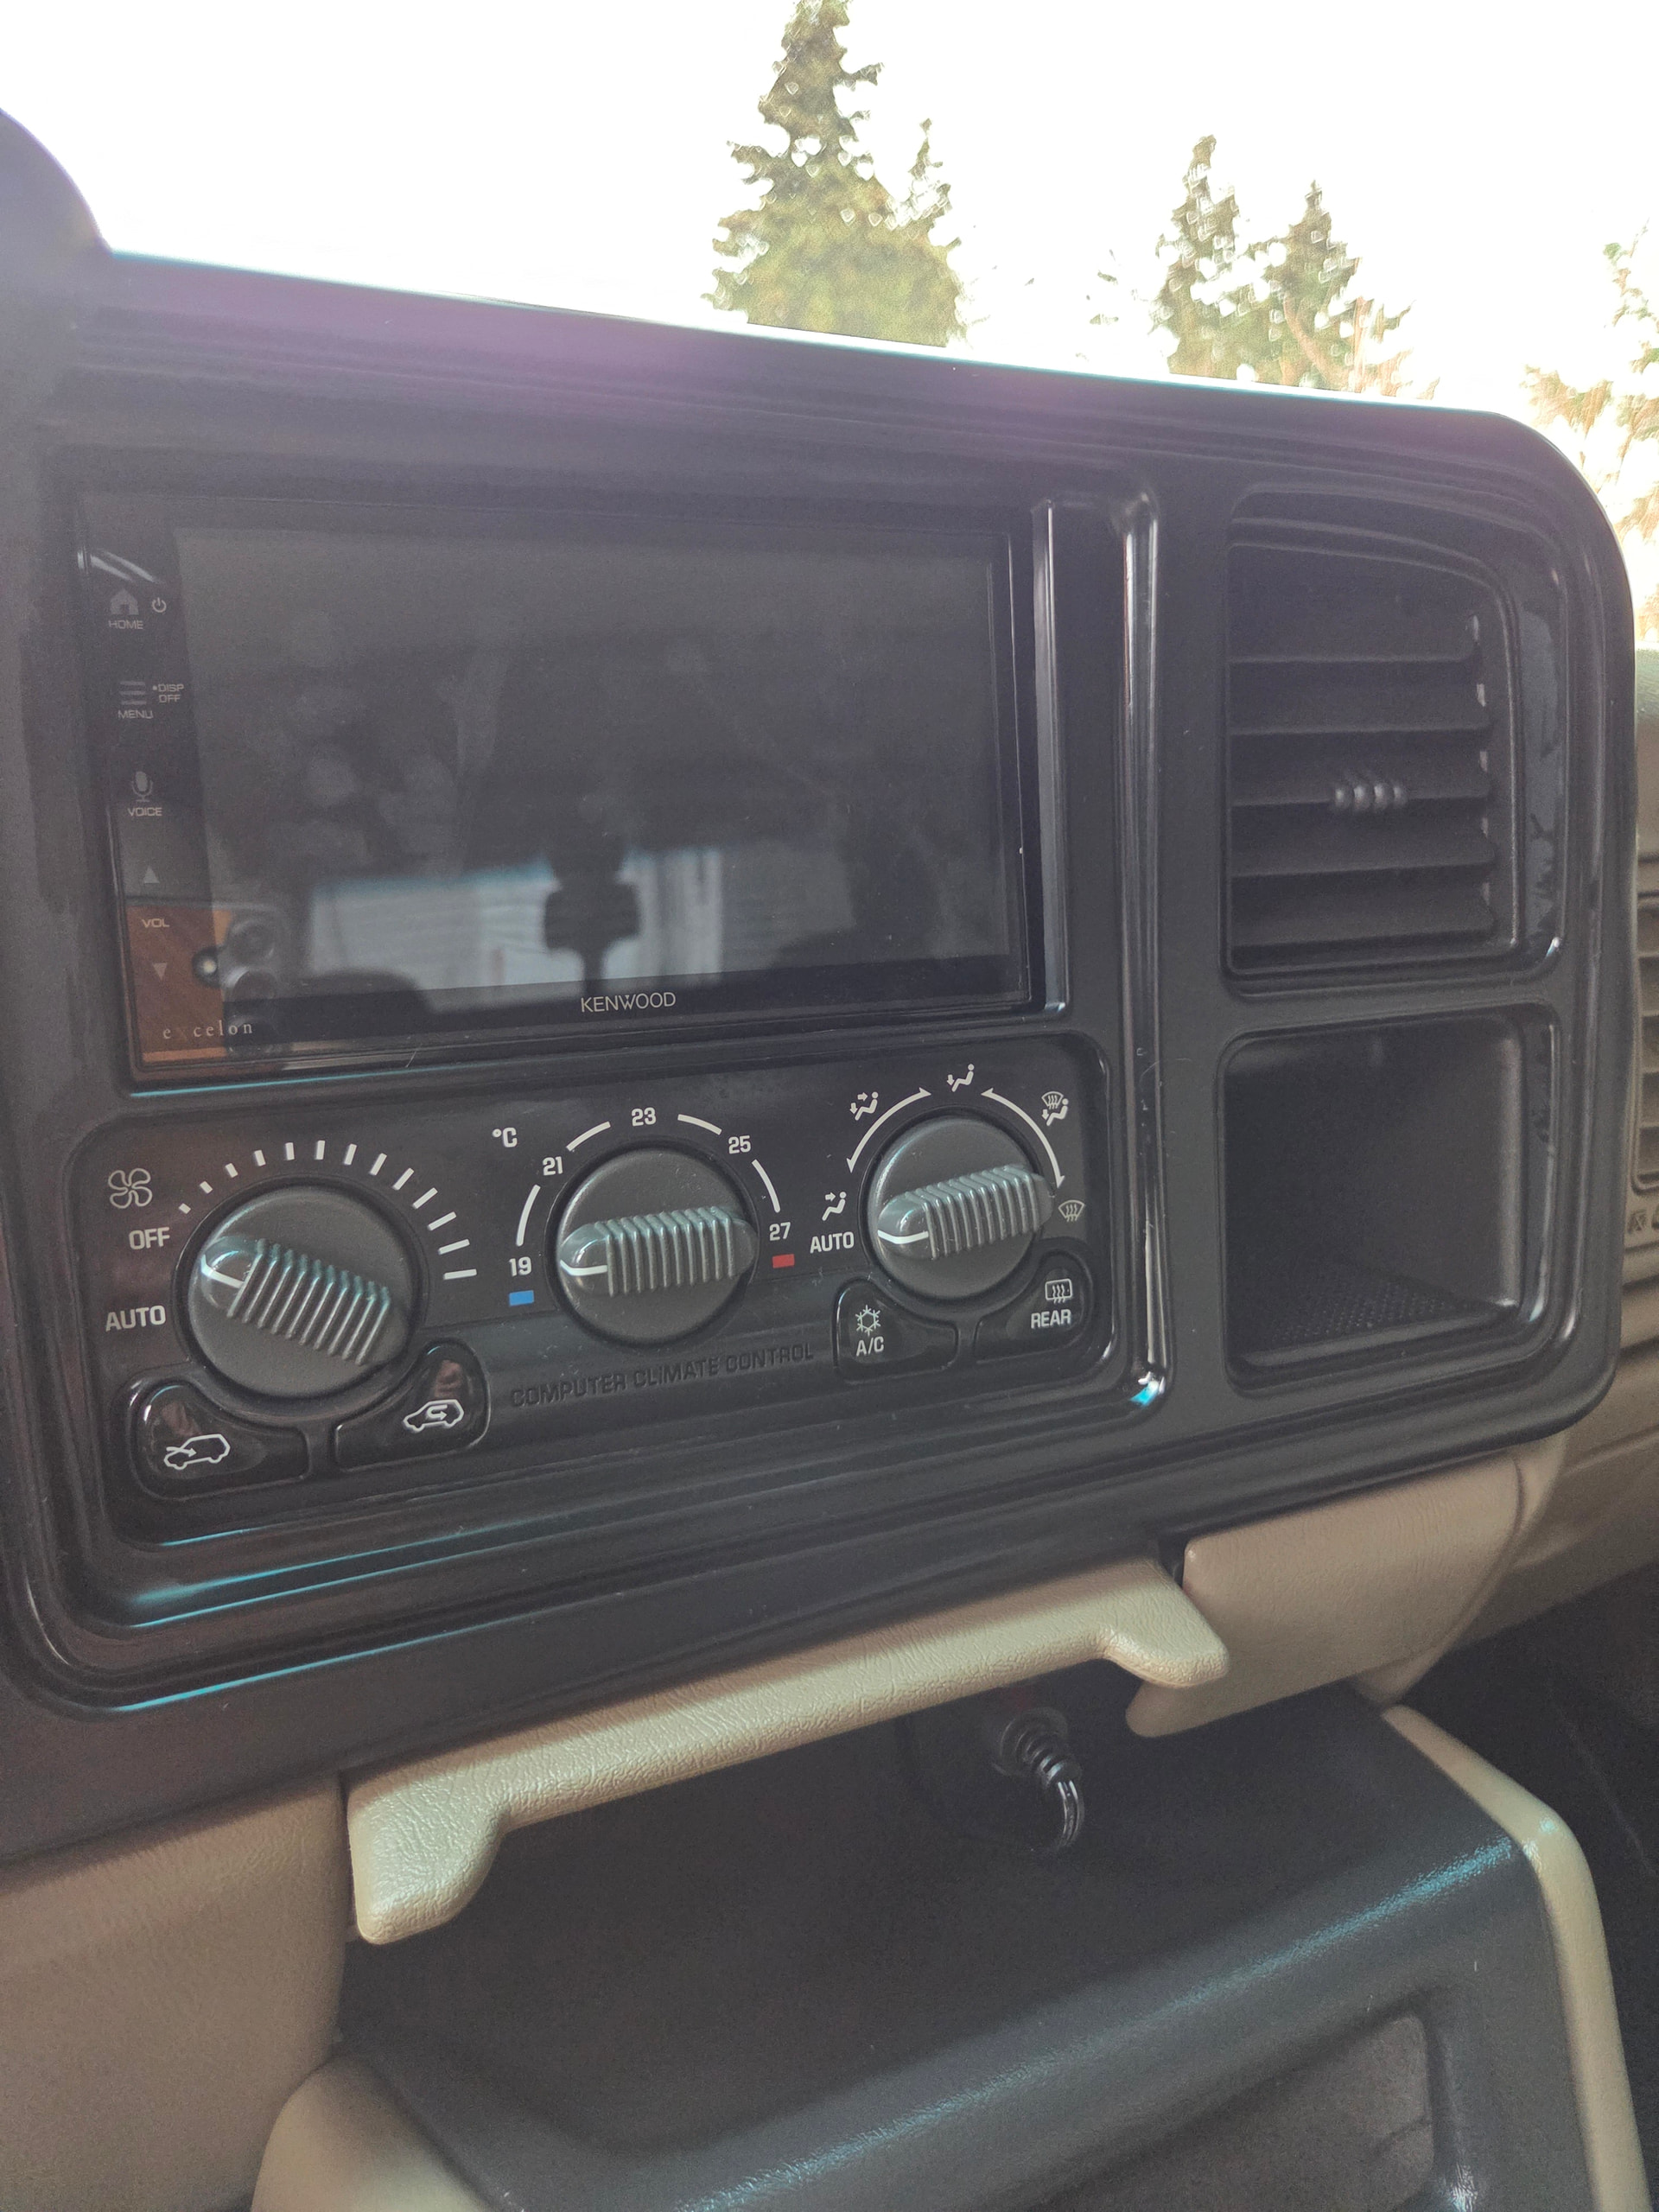
Final Result
- Full double DIN fit in a 99–02 dash, opens things up for front and rear cameras.
- Clean OEM-style finish
- Modern functionality without gutting the interior
This is the standard way to do it. Anything involving 03–06 dash parts is extra work for no gain.
Metra Double Din Video Here:
Parts / Links
Bezel for 99-02:
- Metra: Amazon.com: Metra DP-3002B Double DIN Dash Kit for 1999-2002 GM Full-Size Trucks and SUV's (Matte Black) : Automotive
- DNA Motoring 99-02 kit (budget — reuse factory clips): Amazon.ca
- 303 Protectant for the bezel: https://amzn.to/4dhsOyx
Wiring Harness:
- Metra Electronics 70-2001 (GM 94-04, Blue/Black): Amazon.com
Antenna Adapter:
- Metra 40-GM10 GM Antenna Adapter (1988-2008 GM): Amazon.com
Note for 03-06 owners: Your trucks are already double DIN — you’ll just need to trim a bit of the upper dash bezel to fit.